Sep 19, 2026
Clutch Slippage and Shudder: Diagnosing Friction Plate Problems in Wet Clutches
A buyer's guide to clutch slip and shudder: how the two symptoms differ, the five usual causes, how to read plate surfaces and oil, what to measure before ordering, and how to specify replacement plat
Slippage and shudder are the two complaints that follow a worn clutch pack into every repair bay: the engine revs but the machine does not move, or the drivetrain judders on every engagement. For importers, distributors, and repair shops that stock replacement friction plates, these symptoms are not just a service headache — they are a diagnosis tool. Read them correctly and they point to the exact part at fault: the friction plates, the separator plates, the oil, or the clearance setting. Read them wrong and the same machine returns with the same complaint and a fresh set of plates installed. This guide explains how slip and shudder develop, how to confirm the cause, and how to specify replacement plates so the problem does not come back.
What Slippage and Shudder Actually Are
Slippage is lost drive. The engine speed rises, but machine speed does not follow, and the gap between the two grows under load. A slipping clutch typically starts in the highest gears or under the heaviest drawbar pull, then spreads to every shift as the friction material thins and the pack loses clamp. Shudder is the opposite symptom: vibration during engagement. The pack grabs and releases in rapid cycles as it closes, so the machine lurches or chatters instead of pulling away smoothly. The two complaints share causes but not always the same cure. Slip usually points to worn linings or low clamp capacity, while shudder usually points to surface condition, oil condition, or uneven engagement, which is why a diagnosis should separate the two before any parts are ordered.
The Five Usual Causes
In wet clutch and brake service, almost every slip or shudder complaint traces back to one of five causes. The first is worn friction linings: as paper, copper-based, or iron-based material thins, the apply piston runs out of travel and clamp force drops. The second is the oil — the wrong grade, low level, or heavily contaminated fluid changes how the plates engage. The third is glazed surfaces: overheating bakes the friction faces smooth and slick. The fourth is warped or scored separator plates, which keep the pack from closing evenly. The fifth is incorrect clearance: a pack assembled outside its stack height band either drags or slips from day one. Working through these five in order rules out the cheap fixes before the expensive parts.
Check the Oil First
Oil is the fastest thing to rule out because it costs nothing to inspect. Dark, burned-smelling, or water-contaminated fluid is a cause, not a side effect: it lowers the friction coefficient at the plate faces and degrades paper-based linings fastest. A level low enough to starve the clutch piston has the same effect as a worn pack. If the fluid is wrong for the application, even new plates will slip or shudder, which is why the transmission oil guide on this site covers viscosity, additive packages, and how the oil works with copper-based, iron-based, and paper-based friction materials. Change the fluid and filter before condemning the plates.
Read the Plate Surface
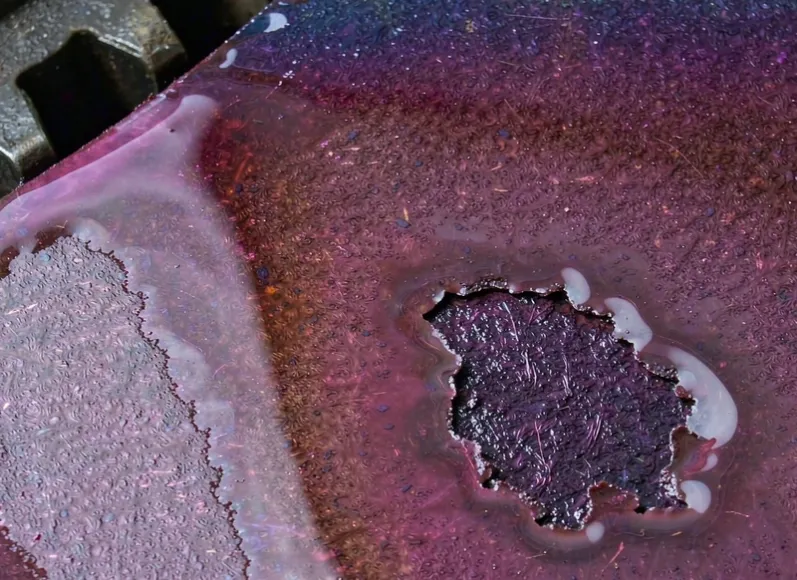
Next, pull the pack and look at the friction faces. A healthy plate is dull and evenly worn; a plate that has been slipping shows a polished, glassy surface where heat melted the top layer of material — glazing. A glazed plate loses friction and adds heat, and once glazing appears, roughing the surface does not restore it. Grooves are the other surface story: when the oil grooves have worn shallow or packed with debris, oil can no longer flow between the faces, and the pack runs hotter and shudders on engagement. The failure modes guide on this site shows what glazing, bluing, and heat checking look like plate by plate, and the groove patterns guide explains how groove depth and layout affect oil flow and engagement feel.
Measure Before You Buy
Once the surfaces point to the cause, confirm it with numbers before ordering parts. Measure the lining thickness against the drawing or the original plate, check every plate for flatness on a surface plate, and then measure the assembled pack under clamp load. A pack can read correct plate by plate and still be wrong as an assembly, which is why stack height is the number that matters at build time. The measurement guide on this site lists the checks in the order an inspector should record them, and the stack height guide explains how to set clearance correctly under clamp load. When the measurements are in hand, the replacement order becomes specific instead of hopeful.
Wet Packs vs. Dry Packs
Symptom reading differs slightly between designs. A wet pack runs in oil, so slip usually announces itself as heat and burned fluid, and shudder often improves briefly after an oil change because the fresh film cushions the faces. A dry pack has no oil to hide behind: slip shows up as dust and smell, and shudder as direct vibration. The wet vs dry guide on this site compares the two designs and explains where each belongs in tractors, harvesters, forklifts, and industrial transmissions, and why the same complaint can point to different parts in each system.
When to Replace Plates and Separators Together
The most common repeat failure is new friction plates on old steel separators. A separator that has warped, dished, or worn into a polished track will not let the new pack close evenly, and the shudder returns within hours. If the separators show bluing, uneven wear bands, or measurable warpage, replace them in the same order as the plates. Our steel separators are supplied flat, parallel, and matched in thickness so the assembled pack comes back to the original stack height without shimming. Pairing new plates with new separators costs little next to a second teardown.
Break-In After a Rebuild
A correctly diagnosed and rebuilt pack still needs its break-in. New plates and separators carry machining surfaces that must seat under light load before the pack is worked hard, and the break-in guide on this site gives the load-and-cool cycle for wet packs in tractors and forklifts. Skipping break-in glazes fresh plates in a single shift and turns a good repair into the next warranty claim. For a distributor, handing the workshop the break-in procedure with the parts is cheap insurance for the order.
Specifying Replacement Plates to Avoid Repeat Problems
When the complaint is understood, the replacement order should describe it. A supplier that only receives a part number cannot know whether the machine slipped from worn linings or shuddered from a clearance error, so the order should carry the measured thickness, the groove depth, and the assembled stack height alongside the OE reference. Material choice matters just as much: copper-based material survives heat better, iron-based material suits high clamp loads, and paper-based material shifts smoothest, which is where the material comparison guide on this site helps match the application. The custom sourcing guide explains how to put those values into a specification sheet with tight thickness tolerances, so the replacement pack behaves like the original.
Conclusion
Slippage and shudder are not vague complaints; they are the clutch pack reporting its faults in order. Rule out the oil, read the plate surfaces, confirm with measurements, and replace plates and separators as a matched set, and the complaint does not come back. As a friction plate manufacturer we supply copper-based, iron-based, and paper-based friction plates and matched steel separators to OEM drawings, and we ask for the same measured values any good diagnosis produces before we build. Our FAQ covers common questions about replacement, tolerances, and rebuild intervals.