Sep 13, 2026
Installing and Breaking In Wet Clutch Friction Plates: A Step-by-Step Procedure
A specifier's guide to installing new friction plates in a wet clutch or brake pack: cleaning the oil circuit, matching plates by dimension and groove, setting pack clearance, torquing to spec, and ru
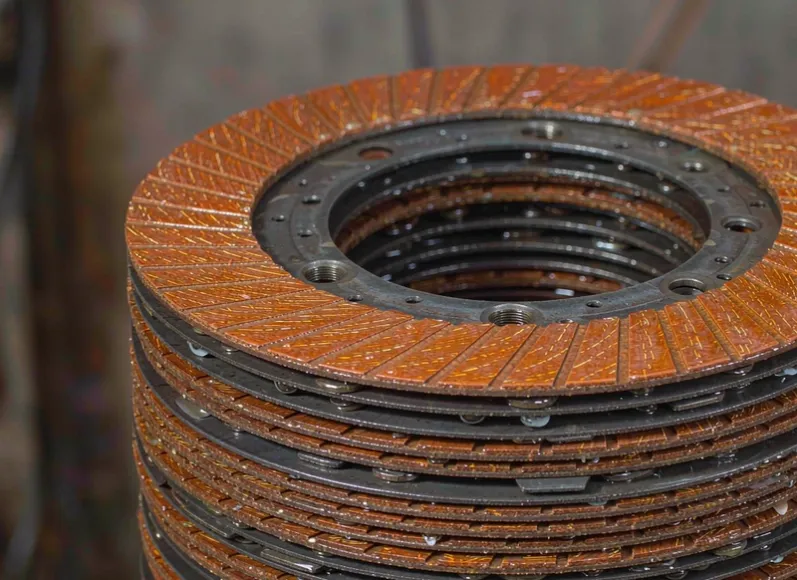
Buying the correct friction plates is only half the job. The other half is putting them in the clutch pack the right way and running them in so the lining seats against the separator plates without glazing, slipping, or overheating. A perfectly specified plate installed with scored separator plates, wrong clearance, or no break-in will fail early, and the failure often looks like a material defect when it was really an assembly error. This guide walks through the removal, inspection, cleaning, installation, and break-in of a wet clutch or brake pack so a new set of plates delivers its full service life in tractors, forklifts, harvesters, and construction transmissions.
Gather the Right Tools and Information First
Before the pack comes apart, collect what you need so the job is not interrupted. You will want a service manual or OE specification for the clutch, a torque wrench, feeler gauges or clearance shims, a depth gauge or vernier caliper, clean lint-free rags, and the correct transmission or hydraulic oil. Have the new friction plates and separator plates on hand and verify they match the old ones by dimensions and groove pattern before you start. Working with contaminated or wrong oil is one of the fastest ways to destroy fresh grooves, so confirm the oil type and change it rather than topping up. Our measurement guide lists the exact dimensions to record, and our OE sourcing guide explains how to confirm a replacement against the supplier's specification.
Remove and Inspect the Worn Pack
Pull the clutch drum or brake carrier and lay the plates out in the order you removed them; a quick photo of the stack saves guesswork on reassembly. As you remove each plate, note the groove pattern, radial, cross, or waffle, because the replacement must carry the same style or the oil flow design changes. Check the separator plates for scoring, heat tint, and warpage; a separator plate that is blue from heat or ridged from abrasion will chew through a new friction lining in hours. Inspect the clutch springs or Belleville washers for set or cracking, and check the hub and basket for wear that changes pack clearance. If the failure that prompted the job was slipping or overheating, trace it to a cause, a clogged cooler, a weak pump, or wrong oil, before fitting new plates, or the new set will fail the same way. Our failure modes guide explains how trapped heat and poor oil flow glaze a lining.
Clean the Housing and Oil Circuit
A new pack runs in old oil unless you flush the system. Wipe the clutch housing and drum, clean the magnet in the sump, and inspect the screen or filter for debris. If the old plates failed from contamination, the cooler and galleries may still hold varnish and metal; flush or replace them. Confirm oil actually flows through the clutch by checking pump pressure and cooler restriction, because grooves on a friction plate only work if oil reaches them. Most of those causes are in the oil circuit, not the plate.
Confirm the Replacement Plates Match
Before installation, compare the new friction plates to the removed ones. Match outside diameter, inside diameter, thickness, tooth count or drive tang pattern, and groove style. A plate that is a few tenths of a millimeter too thick changes pack clearance and clamp load; one with the wrong groove pattern redistributes oil incorrectly. If you are cross-referencing from a part number, our identification guide shows what to record when the number is worn, and our custom sourcing guide covers when a non-standard pattern is justified. For material choice, our material comparison guide explains which lining family suits the duty and oil.
Install Separator and Friction Plates in the Right Order
Wet clutch packs alternate separator plates and friction plates, and the order and count matter. Start from the correct end, usually a separator plate against a flat or the backing plate, and interleave the friction plates so the pack closes evenly. Watch for directional plates: some friction plates have grooves or chamfers that must face a specific way, and flipping them changes oil exit. Count the plates against the removed stack and the manual; adding or dropping one plate changes clearance and engagement. Keep everything clean, a single grain of grit can score a running surface, and lubricate the plates with the specified oil as you stack them so they seat without dry drag.
Set the Clutch Pack Clearance
Clearance, or end play, is the gap the pack closes as it engages, and it is set with shims or selective backing plates. Too much clearance lets the plates slip and overheat before they bite; too little prevents full release and drags the clutch. Measure the stack height, compare it to the spec, and add or remove shims until it is in range. This step is where many early failures start, because clearance was assumed rather than measured. If you changed material or thickness from the original, recheck clearance against the new stack height, not the old number.
Torque the Basket and Hub to Specification
The clutch basket, hub, and retaining nuts must be torqued in the sequence and value the manual specifies. Under-torqued fasteners let the pack walk and wear unevenly; over-torqued ones distort the housing and change clearance. Use a calibrated torque wrench and a pattern, not guesswork, and fit any locking devices the design uses. This is also the point to confirm the actuator, a hydraulic piston or servo, moves freely and seals without bypass, because a weak actuator will slip the new plates even at correct clearance.
Run the Break-In Procedure
New friction lining needs a break-in, a short period of gradual engagement that transfers a thin, even film of lining material onto the separator plates and seats the surfaces. Skip it and the plates can glaze or grab. The practical routine is to make a series of light, partial engagements, letting the oil carry heat away between them, and to avoid prolonged slip or hard, full-lock launches for the first hours of operation. Keep oil temperature in the normal range; excessive heat during break-in bakes the lining instead of seating it. The exact cycle depends on the machine, but the principle is the same across agricultural, forklift, and industrial packs: build load slowly, watch temperature, and let the surfaces mate.
Change the Oil After Break-In
The first hours of running shed lining material and any assembly debris into the oil. Drain and refill, or at least filter, after break-in so the new pack runs on clean fluid. This is also the time to confirm oil level and cooling are correct, because the pack will now see full duty. A clean first change protects the grooves you just installed and is cheap insurance against an early failure.
Common Installation Mistakes to Avoid
The mistakes that kill new plates are predictable. Reusing scored or warped separator plates is the most common; the new lining simply copies the damage. Setting clearance by guess, skipping the break-in, fitting dry plates into a contaminated circuit, over-torquing the basket, or dropping a plate from the count all shorten life. Another is assuming any plate of the right size will do, when groove pattern and material family decide how the pack actually behaves. If you are unsure whether the original pattern is right for the duty, our groove patterns guide and our wet-versus-dry comparison help you decide, and our lifespan and replacement intervals article explains the warning signs that a pack is due.
Conclusion
Installing friction plates is a measured procedure, not just a swap. Inspect and clean the oil circuit, match the replacement plates by dimension and groove, stack them in the correct order, set clearance by measurement, torque to spec, and run a gradual break-in before full duty. Do those steps and a correctly specified plate will reach its designed life; skip them and even the best lining fails early. As a friction plate manufacturer we support buyers with dimensional verification, groove-pattern matching, and custom configurations for agricultural, forklift, and industrial transmissions, and our FAQ covers common replacement and oil-change questions.